HANGING A (MOSTLY FUNCTIONAL) GALLERY WALL, WITH KAY!
Share
Good morning, kids. Today we'll be discussing the delicate balance and symmetry that goes into creating the PERFECT GALLERY WALL! Yes, you heard me right, the *perfect* gallery wall. You may be curious how I could possibly help each and every one of you sweet souls curate THE perfect accumulation of art, but honestly, it's easy when you reiterate the fact that: Your home exists for you and yours, and no one else. So as long as you walk away from this experience feeling joyous toward your new art arrangement, we'll be Gucci here. With that being said, there are many do's and even more don't's when it comes to a "good" gallery wall. I'll be touching on a few of those basic rules below - and please keep in mind, I seldom have any idea what I'm talking about soooo....
1. Accumulate art. If you’re going for a large and impactful gallery wall, you’ll want a healthy mix of art to choose from. One red flag of any gallery wall is the feeling of desperation… give yourself plenty to work with, from size, to subject matter, color, and style.
2. Somewhat of a serious caveat to rule number 1; while you want diversity that leads to the ample “wow” moment, you also want an organically cohesive look through-out your entire wall. You can easily do this with similar colors, subject matter, and general tone to a piece. I personally like pairing prominent colors. It’s easy on the eye and creates a natural color palette to work off of.
**A helpful way to pinpoint a style you enjoy is to gather the art you already own and do a little research - what things do you notice in common about these pieces? Are there similar line weights? Textures? Colors? Concepts? Etc. You can do a bit of “reverse engineering” to find commonalities between items you collect to better articulate your style preferences**
For example: One could argue that I tend to collect more playful art with bold and solid line weights. I like flat color blocked prints with individual characters and minimal fine details. I find myself interested in appropriated characters from my childhood as I feel they're comforting to me as well as strike up conversation with my guests.
3. Know your space! While I (personally) don’t get too laser focused on the dimensions of any given print, I’ll typically measure the larger pieces and work around them, slowly filling things in like a puzzle. Be mindful of size variations. You don’t want too many of any one size but especially *small things* - too many smalls in any given space will make it feel messy and cluttered. I also try to avoid unframed items as I find them to look like “rushed” or unplanned/ added out of desperation. Look into alternate hanging styles as well, not everything needs to be traditionally framed just framed in a way that adds worth to the piece. 4. All in all, your gallery wall isn’t a collection of many pieces but rather a larger system of art that acts as ONE larger entity. Have fun and remember, no home is ever truly finished so feel comfortable leaving free space to fill in later!

5. Keep the spacing between your photos mostly consistent…this is, of course, easier said than done lol. I try to keep any given piece at least an inch apart but not much more - keep your t-square or measuring tape on hand, trust me.
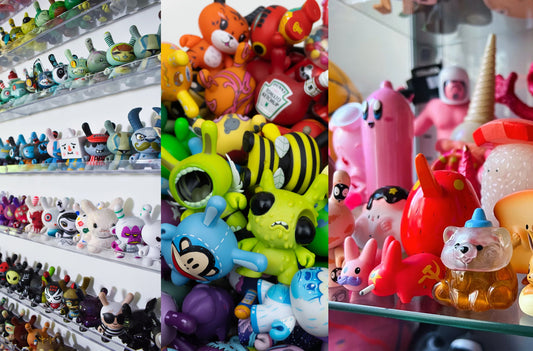
6. SWITCH IT UP! Add sculptural items to your gallery walls to introduce a resting point for your eyes :) My custom wooden shelves (by @c3shelves on instagram) are home to some of my favorite toys that live amongst my wall! The shelf even lights up for an added effect.
7. There are ample shelving options to choose from - but try to mimic the tone of your gallery wall when choosing your alternate hanging options, shelves, sculptures, etc. So if you have a more modern gathering of art opt for a slick shelf with little detailing.

8. Unpopular opinion, I'm perfectly fine with displaying framed prints on the floor!! As long as they're truly protected from dirt, dust, and potentially being kicked, it's a great look. In doing so, I think you can create a lovely effect that alludes to an abundance of art. We can call it an extended gallery wall and keep it between us hehe.


9. The devil is in the details, folks! You'll (more times than not) catch me displaying small figurines on my frames with a broader width. Anything from a 3" Dunny to a cluster of micro glass mushrooms - placing these mini interactive moments on your display's will leave any viewer in awe of your dedication to collecting and displaying!
*Seen below are a few examples* I've managed to turn an entire frame into a functional shelf for a few of my 3" Super Plastic Janky's! I've gone even further and decided to arrange them in a rainbow gradient orientation to read easier on the eyes. When you have a lot of information on any given wall, it's helpful to display a cluster of items in a purposeful way. I typically opt for a rainbow gradient.

10. Last but not least....once you've finished hanging your art, take a step back, appreciate your work, and snap a photo of it to virtually brag! But in all seriousness, have fun, take your time, and tag my instagram in your best gallery walls! @Kaymaycreates
I hope you've learned at least one thing from the time we've shared together and if not, thanks for at least sticking around and exercising your attention span with my reading!!! Much love, Kay May ❤️


